Compatibility issues with different macOS versions
This article is about AdGuard for Mac, a multifunctional ad blocker that protects your device at the system level. To see how it works, download the AdGuard app
Currently existing problems
Every year Apple releases a new version of macOS, introducing innovative solutions and adding new useful features. But some of them, such as Network Extensions API (Big Sur) or iCloud Private Relay (Monterey), cause some problems to many applications, AdGuard not being an exception. In this article we go over the known issues specific to each macOS version and possible ways to solve them.
Monterey 12: currently existing problems
These problems aren't fixed by Apple yet, or fixed only partially.
Compatibility with iCloud Private Relay
Currently, AdGuard and iCloud Private Relay cannot work at the same time. AdGuard has no ability to block ads because iCloud Private Relay encrypts traffic before AdGuard can filter network connections. When iCloud Private Relay is active, any filtering (including local filtering) becomes impossible. Thus, AdGuard can't filter traffic or perform DNS filtering in Safari. That's why by default, AdGuard uses the "default route" which disables iCloud Private Relay.
For a deeper understanding of this problem, read this article.
Recommended solution
We recommend using AdGuard together with a more traditional VPN service such as AdGuard VPN.
Alternative solution
You can prevent AdGuard from using the "default route" by disabling it. It can be done via Advanced Settings → network.extension.monterey.force.split.tunnel. Note that enabling this setting will cause the problems described above.
Compatibility with Protect Mail Activity
Apple's Mail app now uses a proxy to hide a user's IP address when downloading images from emails. However, it won't work if there's an active VPN connection. As it treats AdGuard as a VPN, it won't preload images automatically.
For a deeper understanding of this problem, read this article.
Recommended solution
At this point, we recommend using a more traditional VPN service, such as AdGuard VPN, instead of the newer Apple privacy features.
Monterey 12, Big Sur 11.6 and later: currently existing problems
These problems aren't fixed by Apple yet, or fixed only partially.
Compatibility with Cisco AnyConnect
AdGuard will not work together with Cisco AnyConnect while in the Network Extension mode. You have to switch AdGuard to Automatic Proxy mode. To do so, follow this instruction.
Compatibility with Flutter
This problem is solved in Flutter 2.2, released in June 2021. But to fix it for applications developed in Flutter, you need to wait for updates.
If you use Flutter alongside AdGuard in "Network Extension" mode (or any other "Transparent Proxy"-type app) in Monterey or Big Sur, you will run into problems: projects won't open and Flutter will be effectively broken. We have already reported this bug to Apple. Meanwhile, you can use these temporary solutions:
Use AdGuard in Automatic Proxy mode.
Disable SIP and switch AdGuard to Kernel Extension mode as explained here.
VPN apps with legacy API
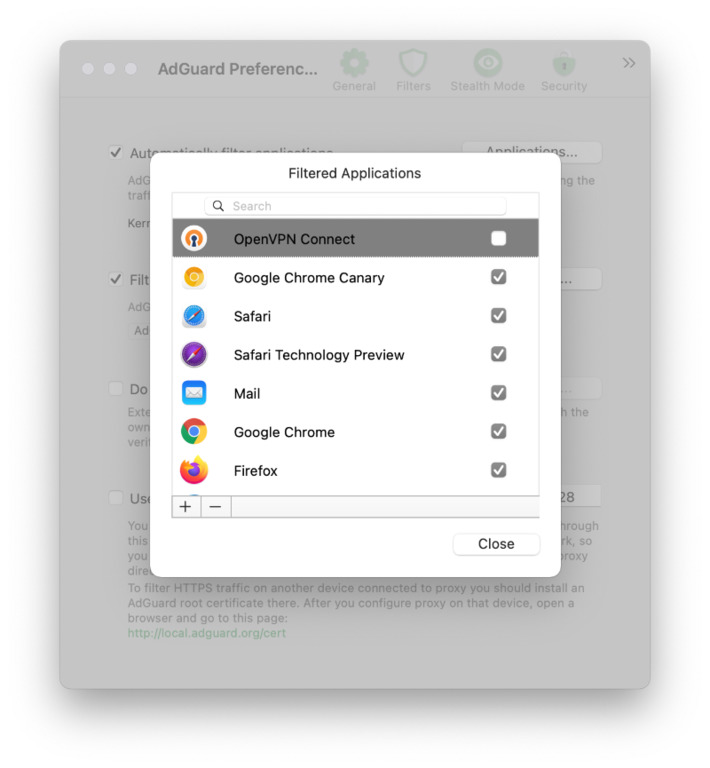
Despite AdGuard is displayed as a VPN in system settings, it shouldn't cause any conflicts when working alongside other VPN-based apps. However, if you're using a VPN-based app that was downloaded from outside App Store, there's a chance it uses the old VPN API and you have to exclude it from filtering:
- Open AdGuard's menu.
- Select Preferences....
- Switch to the Network tab.
- Click the Applications... button.
- Find the app you want to exclude and uncheck the checkbox next to it.
Already fixed problems
These problems have been fixed by Apple by now but can be encountered in the older versions of macOS Big Sur.
Compatibility with Little Snitch 5
At this moment, Network Extension mode in AdGuard isn't compatible with Little Snitch 5. When both are running, there's a chance to encounter issues with various apps' behavior, even if they aren't filtered by AdGuard. This problem is directly caused by a bug in Big Sur, and we've already informed Apple about it. This leaves us to believe that this issue will get resolved in one of the next updates.
It needs to be said that this problem can't be solved by disabling connections monitoring in Little Snitch, because this action doesn't unload Little Snitch's extension from the system. We recommend to switch to Automatic Proxy filtering mode when running AdGuard alongside with Little Snitch on Big Sur, at least until Apple fixes the bug.
Compatibility with local proxies
Now AdGuard can filter local proxies (mostly) without any problems. If you encounter any issues in OS versions 11.1+, or if you're using Big Sur 11.0, remove the local proxy from System settings and configure an upstream proxy in AdGuard by following the instruction below.
To configure an upstream proxy in AdGuard for Mac in Big Sur:
- Open AdGuard's settings Preferences → Network → Outbound proxy.
- Choose HTTP, HTTPS, SOCKS4 or SOCKS5, depending on your proxy type.
- Fill in the fields:
hostis the IP address of your proxy server,portis the desired port number to be used by the proxy server,userandpasswordare corresponding username and password of your proxy (if needed). Ignore either or both when not applicable.
If you run into any problems, please contact our tech support at support@adguard.com.
Example 1: Configuring an upstream Shadowsocks proxy
Here's an example of how to configure an upstream proxy for Shadowsocks.
First of all, you need a working server side for your proxy. Most likely, to set it up, you would use a JSON file like this (server and password values were chosen randomly here):
{
   "server":"111.222.333.444",
   "server_port":8388,
   "local_port":1080,
   "password":"barfoo!",
   "timeout":600,
   "method":"chacha20-ietf-poly1305"
}
You can find more information about how to get started on Shadowsocks website.
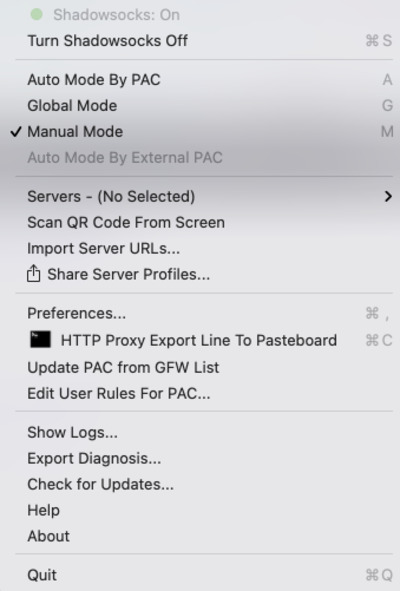
Then you'd have to install Shadowsocks client on your Mac. Make sure that you select 'Manual Mode' or 'Auto Mode' in its settings! The configuration won't work if you select 'Global Mode' (or 'Auto Mode' in Big Sur versions prior to 11.1).
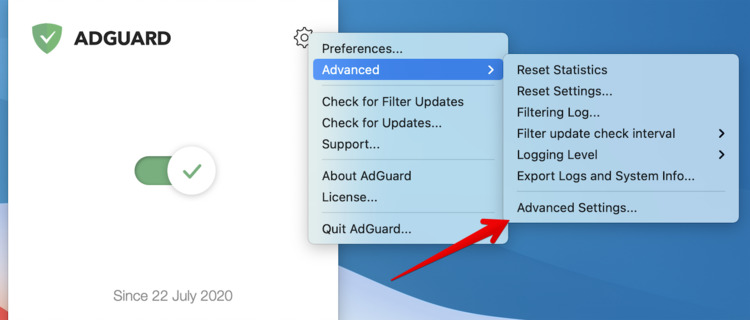
Now go to AdGuard menu → Advanced → Advanced Settings... and set the Value area of the upstream.proxy setting to socks5://localhost:1080. Notice that you need to use "local_port" value from the JSON file here.
Because Shadowsocks uses SOCKS5, you also need to set the value of the upstream.proxy.socks5udp setting in AdGuard Advanced Settings to true to make AdGuard route UDP traffic to the proxy server.
Example 2: Configuring an upstream Surge proxy
In Big Sur v11.1+, there are no known conflicts between AdGuard and Surge proxy. If you are using an older version of Big Sur (prior to 11.1), check that System Proxy in the bottom right corner is disabled. Otherwise, Surge won't work with AdGuard. On the other hand, Enhanced Mode can be enabled without causing a conflict in any Big Sur version.
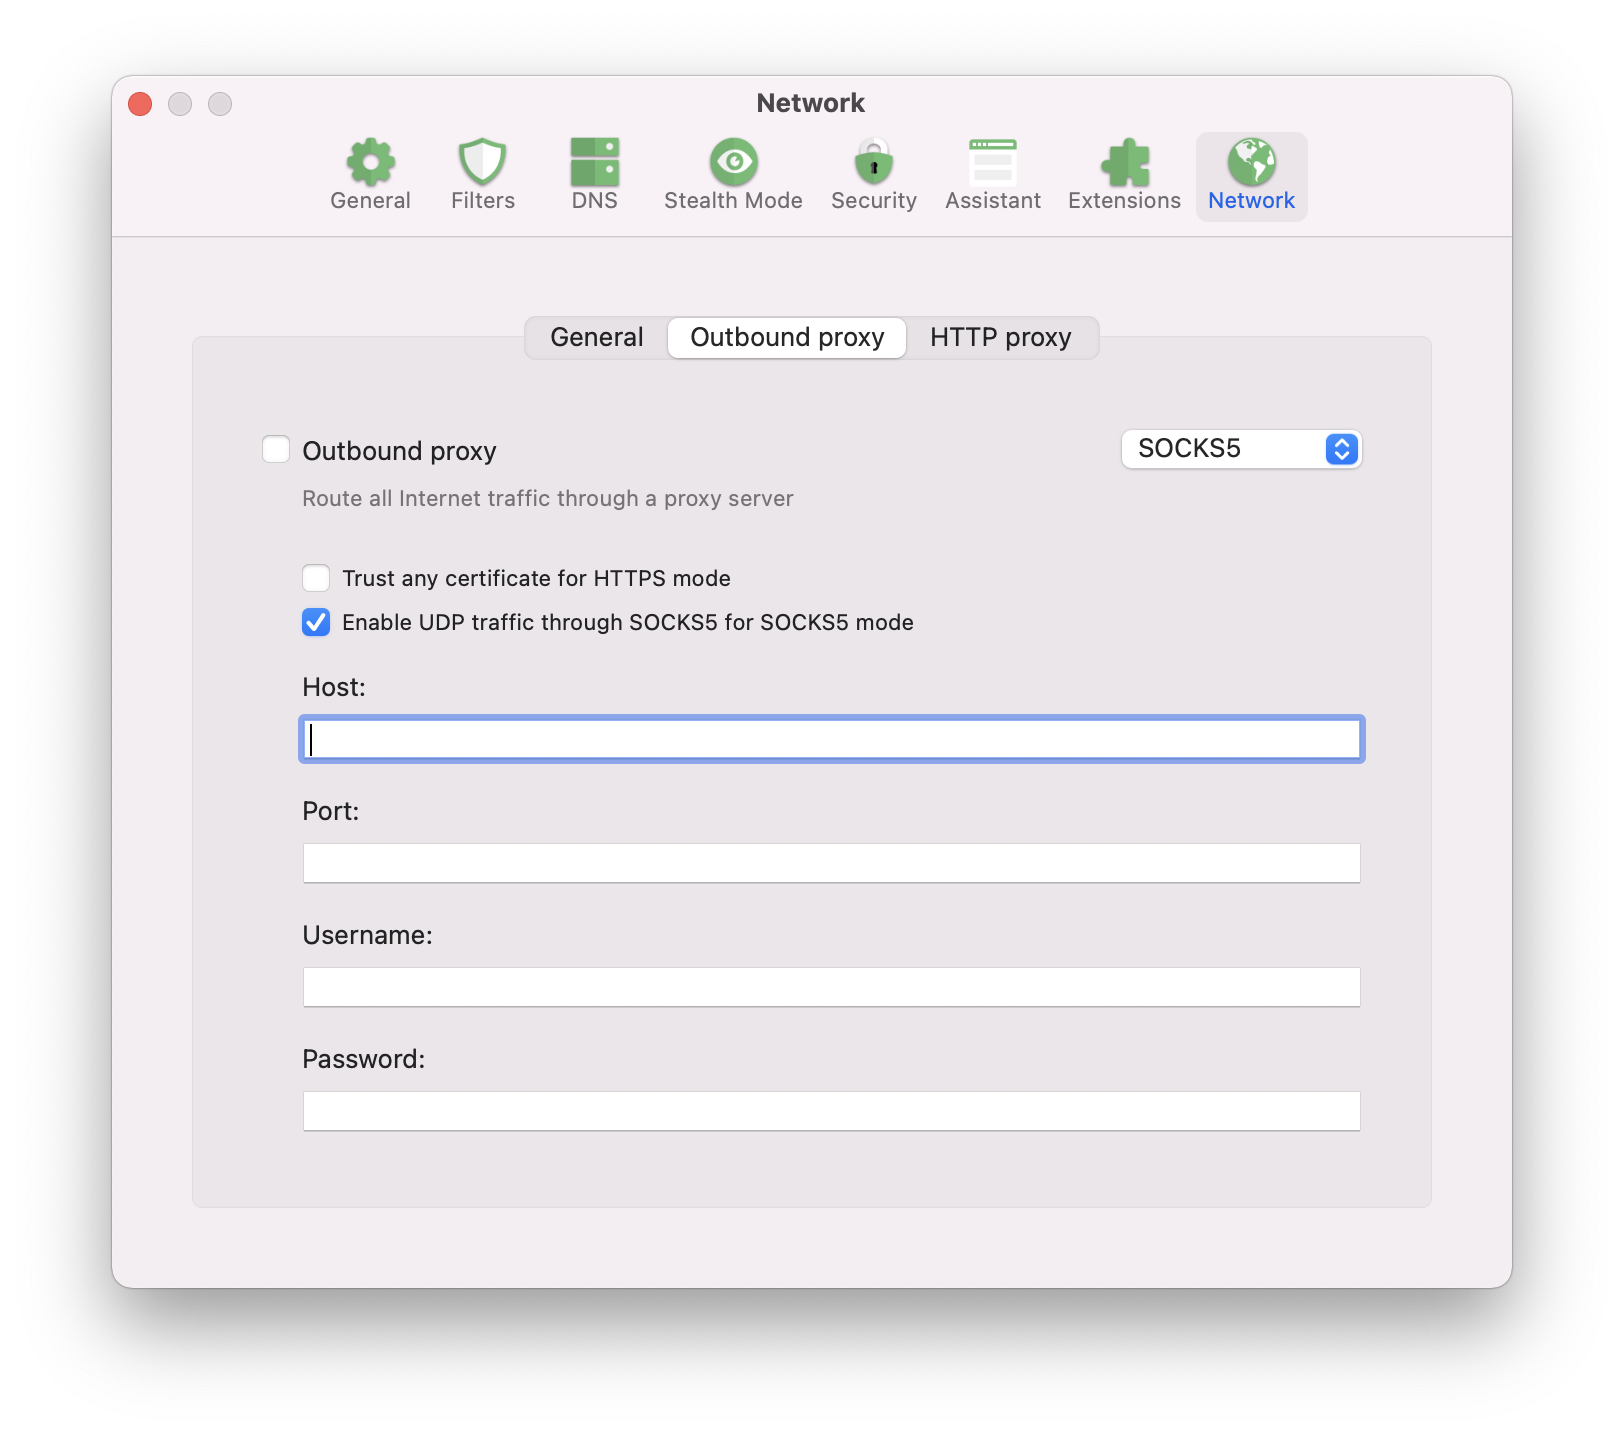
Now go to Preferences → Network → Outbound proxy and fill in the fields. For SOCKS5 proxy type:
host: localhostport: 6153 For HTTP proxy type:host: localhostport: 6152
Alternatives to using a Network Extension
It's impossible to foresee each and every possible problem that can pop up in Big Sur or Monterey, there are countless various hardware/software and settings configurations. If you face any compatibility issues, please contact our support team, but feel free to try one of these workarounds first.
Using "Automatic proxy" filtering mode
If you face problems in Big Sur or Monterey which can't be resolved by any of the methods above, you can try switching AdGuard to Automatic proxy mode.
- Open AdGuard's menu.
- Select Preferences....
- Switch to the Network tab.
- Click the Select Mode... button.
- Select Automatic Proxy.
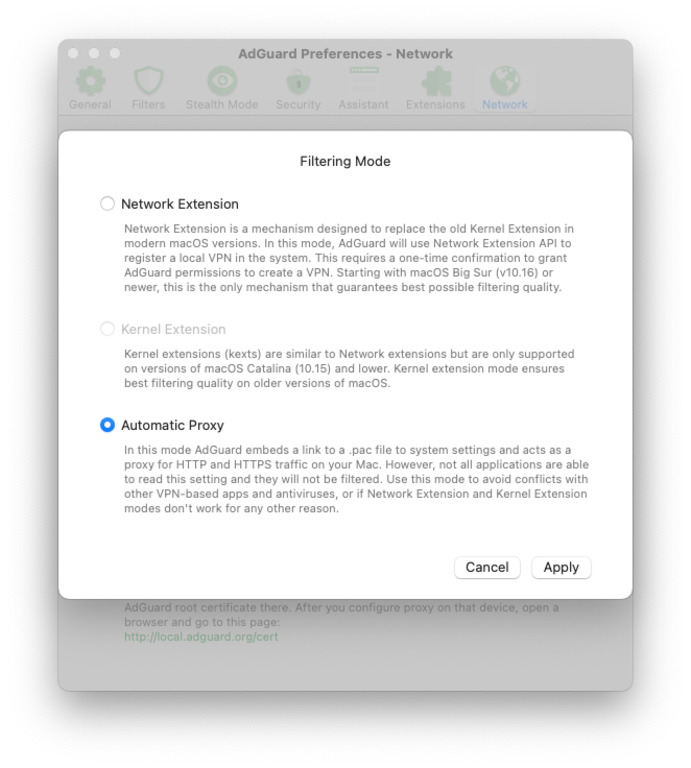
Now AdGuard has automatically added a .pac file to your Mac's network settings, so that the system will consider AdGuard a proxy and try to send all traffic through AdGuard.
Some apps may ignore this system setting and their traffic will not be filtered.
Enabling Kernel Extension in Big Sur and Monterey
By default AdGuard uses Network Extension framework in Big Sur and Monterey as the old Kernel Extension framework is disabled there. This can cause some compatibility problems, but to enable Kernel Extension back, you need to disable System Integrity Protection (SIP) first. To disable SIP, follow this instruction:
- Click the Apple symbol in the Menu bar.
- Click Restart…
- Hold down Command-R to reboot into Recovery Mode.
- Click Utilities.
- Select Terminal.
- Type
csrutil disable. - Press Return or Enter on your keyboard.
- Click the Apple symbol in the Menu bar.
- Click Restart…
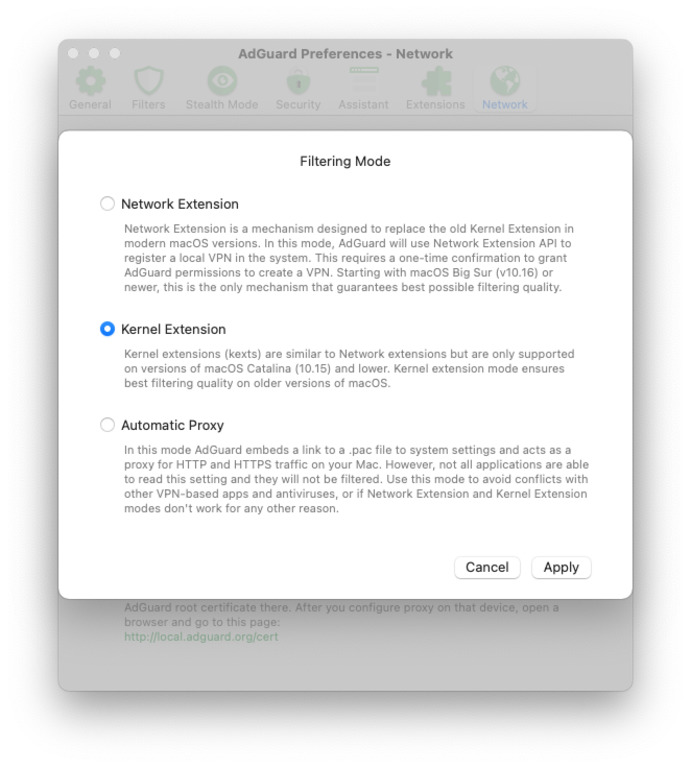
Now that SIP is disabled, this is how you enable Kernel Extension:
- Open AdGuard's menu.
- Select Preferences....
- Switch to the Network tab.
- Click the Select Mode... button.
- Select Kernel Extension.
- Confirm that you want to switch to Kernel Extension.
However, we only recommend using this method if everything else fails, as this may lead to unexpected issues.